
A garlic press fails in two places: the squeeze and the cleanup. If the handles flex, the chamber clogs, or the basket traps fibers like wet paper in a drain, the tool becomes drawer clutter after three dinners. Listen, garlic is not difficult. The bad kitchen gadget is the problem. A decent press should crush 2 medium cloves in under 20 seconds, leave less than 1/4 teaspoon of paste behind, and rinse clean before the pan even finishes heating.
At a Bay Area cooking workshop, Maya brought a cheap press that looked fine in the package. After 17 cloves for a tomato sauce, the hinge bent, the holes blocked, and the handles pinched her palm. Classic. The same sauce made with a sturdier metal model took 3 minutes less in food preparation and produced a smoother garlic paste for the soffritto. That is the whole dilemma. The best garlic press is not the fanciest one. It is the one that applies force cleanly, wastes little, and is easy to clean before the garlic dries into cement.


What Makes the Best Garlic Press Actually Crush Garlic Well
Material comes first. A press made from stainless steel or solid zinc alloy handles repeated pressure without twisting at the hinge. Plastic chambers can work for a few weeks, but they often flex when a clove is large, dry, or slightly woody. Once the chamber flexes by even 1/16 inch, pressure escapes sideways instead of pushing garlic through the holes. Result? Half-crushed cloves and annoyed hands.
A good garlic press should feel heavy enough to resist torque, but not so heavy that it becomes awkward over a cutting board. Around 7 to 9 ounces is a practical range for most home cooks. Below that, many presses feel flimsy. Above 12 ounces, wrist fatigue shows up when pressing a whole head for aioli, toum, or a big pot of ragù. In Paris bistro kitchens, the knife still wins for large prep. At home, a sturdy press earns its place when dinner needs to move fast.
Hole size, pressure, and garlic waste
The holes matter more than most buyers think. Tiny holes can produce a fine paste, but they clog if the grid is too thin or poorly finished. Oversized holes create chunky garlic, closer to rough mince than paste. For sauces, vinaigrettes, and marinades, the sweet spot is a grid that produces moist pulp without trapping long fibers. If the press leaves a dry mat inside the chamber after one squeeze, that design is wasting flavor.
Beveled holes help because they cut the clove as pressure builds. Flat stamped holes often mash first, then tear. That difference sounds small until a cook presses 8 cloves into warm olive oil at 250°F for a quick garlic base. Fine paste blooms evenly in 45 to 60 seconds. Ragged chunks brown at different speeds and can turn bitter before the shallots soften. An effective garlic crusher protects the cooking process after the squeeze.
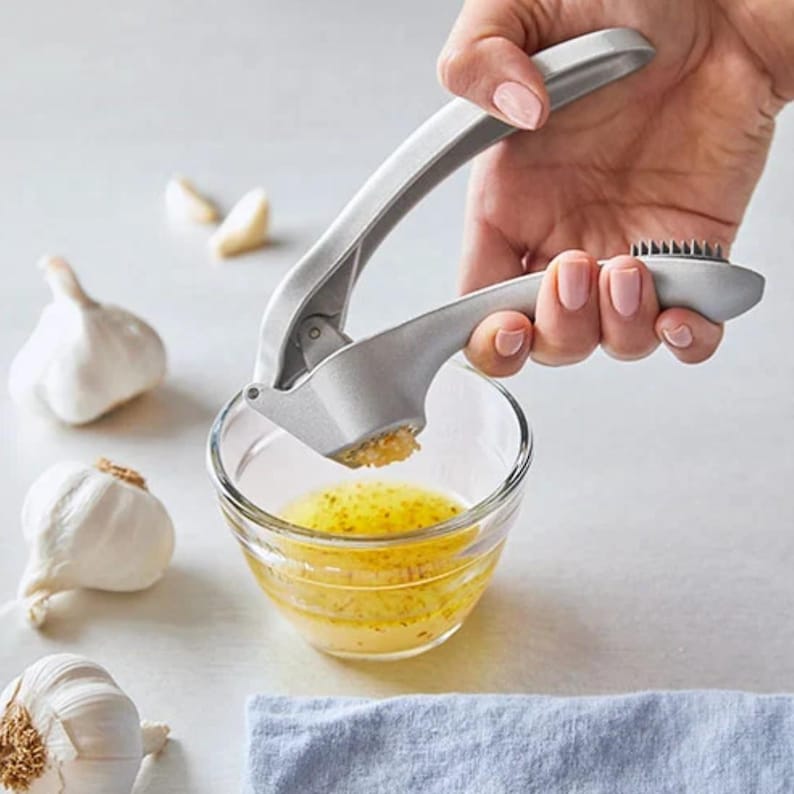
Ergonomics should not be treated as decoration. Wide handles spread pressure across the palm, while thin handles dig into the fingers after 3 or 4 cloves. A double-lever design can reduce effort because it multiplies force before the clove reaches the grid. That helps cooks with weaker grip strength, but it also helps anyone making garlic-heavy food after a long workday. Cooking convenience is not laziness. It is smart mise en place.
The next question is less glamorous. Can the thing be cleaned before the garlic hardens? That decides whether the tool survives in the drawer.
Why Bad Garlic Presses Clog, Bend, and Make Cleanup Miserable
Most weak presses fail from the same three causes: thin metal, cramped chambers, and lazy grid design. Thin metal bends at the hinge first. Once the handles no longer meet squarely, the plunger pushes at an angle and garlic squirts upward instead of through the holes. This is the moment people blame the clove. Wrong target. The tool lost alignment.
Chamber size creates another trap. A small basket is fine for one peeled clove, especially if cooking for one or two. Fill that same basket with 3 cloves, and the pressure spreads unevenly. The bottom clove becomes paste. The top clove turns into a flattened lump. If Maya makes weeknight lentils with 2 cloves, a compact chamber works. If she makes 2 quarts of marinara on Sunday, a larger reservoir saves time and reduces repeat squeezing.
The cleaning problem starts during pressing
Garlic fibers are sticky because crushed cells release juice and starch-like compounds that cling to metal. Leave residue in the grid for 6 minutes, and it firms up. After 20 minutes, especially near a warm stove, the trapped bits need scrubbing. This is why easy to clean cannot be an afterthought. A press that opens wide, flips its grid, or has a removable insert is usually faster to rinse than a closed chamber with corners.
Dishwasher-safe construction helps, but it does not solve everything. Garlic trapped in holes can dry before the dishwasher cycle starts. The better habit is simple: rinse under hot tap water for 15 seconds right after pressing, then scrub the grid with a small brush for another 10 seconds. If bits remain, press the bristles from the outside inward. Toothpicks work, but they are slow and annoying (and honestly, nobody wants that during dinner).
Nonstick coatings can reduce residue, but the coating must be durable. A scratched coating collects fibers faster than bare stainless steel. If the product description mentions a coating but says nothing about heat resistance, abrasion, or dishwasher limits, be skeptical. A garlic tool does not need marketing poetry. It needs a hinge that stays straight after 200 squeezes and a grid that rinses clean after 30 seconds.
Shape affects fatigue too. A narrow handle with sharp edges is punishment when pressing ginger or large cloves. A rounded handle with a slip-resistant surface gives better control, especially when hands are wet from rinsing herbs or trimming onions. In practical kitchen terms, comfort means steadier pressure, fewer blocked holes, and less garlic left behind. Garlic press durability and comfort are connected.
A useful garlic press review should spend as much time on residue and hinges as it does on shiny packaging. Pretty tools break too.
How to Test a Garlic Press Before Buying Without Falling for a Bad Kitchen Gadget
In a store, test the hinge before admiring the finish. Open and close the press 6 or 7 times. The movement should feel smooth, with no side wobble. Hold the handles closed and look at the plunger inside the chamber. It should land flat and centered. If it sits crooked when empty, it will behave worse with a firm clove inside. That press goes back on the shelf.
Grip matters next. Wrap the handle in the palm as if pressing 4 cloves for garlic butter. If the edges dig in immediately, imagine the same pressure with wet hands and a full chamber. Not good. A strong press should let the hand push forward naturally, not pinch the fingers together. For cooks with arthritis or low grip strength, a longer handle or double-lever mechanism can make the difference between useful and painful.
What to check online when the press is sealed in packaging
When buying online, ignore vague praise and hunt for cleanup details. Look for user photos showing the chamber after use. Reviews that mention “rinsed clean in under a minute” are more useful than five stars with no explanation. Search for complaints about bending, black residue, rust spots, and trapped peel. If several buyers report the same failure after 2 or 3 months, believe the pattern.
Dimensions help too. A press around 6.5 to 8 inches long usually gives enough leverage for everyday garlic. A chamber that holds 2 medium cloves is enough for most weeknight cooking. Larger baskets are better for batch sauces, marinades, and family meals, but only if the hinge is strong enough to handle the load. Big capacity with weak construction is a trap. More garlic in, more frustration out.
Multi-function models can be useful, but only within reason. Garlic and ginger make sense because both need pressure and both release strong juices. Small soft nuts can work if the grid is sturdy. Peppercorns? Sometimes. Hard spices can stress a press not built for them. A multifunction kitchen tool earns drawer space only if it still performs its main job well after repeated use.
For cleaning, removable parts are helpful when they do not create tiny seams. A swing-open design is often better than a complicated insert with 4 crevices. Dishwasher compatibility is useful, but hand-rinsing still wins for speed. Run hot water through the holes from the outside, brush for 10 seconds, then open the chamber fully and dry it hinge-side up. That small drying habit reduces rust risk and keeps the mechanism from getting sticky.
One final practical test: press an unpeeled clove if the design claims it can handle skins. A capable model should push pulp through and leave most peel behind in one piece. If peel fragments pass through with the garlic, use peeled cloves only. No drama. The right effective garlic crusher should fit the way you cook, whether that means 1 clove for a vinaigrette or 12 cloves for a Saturday pot of sauce.
Cleaning Design Deserves the Same Attention as Crushing Power
A press that crushes beautifully but takes 4 minutes to clean is not efficient. That is a delayed mess. Garlic dries fast, and the residue becomes harder to remove than onion or parsley because it packs into the grid under pressure. The best design gives access to both sides of the holes. If only one side is reachable, cleaning becomes guesswork.
Built-in cleaners can help when their pins align exactly with the perforations. If the pins miss by even a little, they smear garlic instead of ejecting it. Removable sieves can be excellent because they let water hit the trapped pulp directly. The catch? Loose parts disappear in drawers. A removable piece should lock firmly into the press and release without fingernail wrestling.
Hot water is better than soap at the first stage. Rinse immediately for 15 to 20 seconds, before washing the rest of the dishes. Then use a stiff vegetable brush or the small brush that sometimes comes with the tool. Soap comes after the holes are clear. If soap hits packed garlic first, it makes the residue slippery on the surface while the inside stays lodged. Annoying. Avoidable.
Dishwasher-safe materials are still worth choosing. Stainless steel and solid zinc alloy usually tolerate repeated cycles better than mixed plastic assemblies. If a press has rubber grips, check whether water can sit underneath them. Trapped water near a seam can create odor or discoloration after several months. Store the press open for 30 minutes after washing if the hinge feels damp.
For Maya’s kitchen, the winning choice was not the most expensive press on the shelf. It was a sturdy metal model with a wide handle, a chamber sized for 2 cloves, a swing-open basket, and no unnecessary seams. After 31 cloves over three dinners, it still rinsed clean in under 40 seconds. That is the benchmark: strong squeeze, low waste, fast cleanup, and no fight with the sink.


